 跳到内容

Direct–indirect LED linear lighting can make an office feel brighter and more balanced by lighting both the work area and the ceiling. But the words “up and down” do not, by themselves, define a good scheme. The result depends on the ceiling finish, mounting height, optical distribution, desk layout, controls and how the project is tested. This guide gives specifiers and buyers a practical way to review those decisions before ordering a suspended linear system.
For a product starting point, see the FX up–down linkable linear light. Treat its published options as a starting point and confirm the exact variant, photometry and installation details against the current approved sample. A project-specific lighting calculation matters more than a generic “glare-free” promise.
What does direct–indirect lighting actually do?
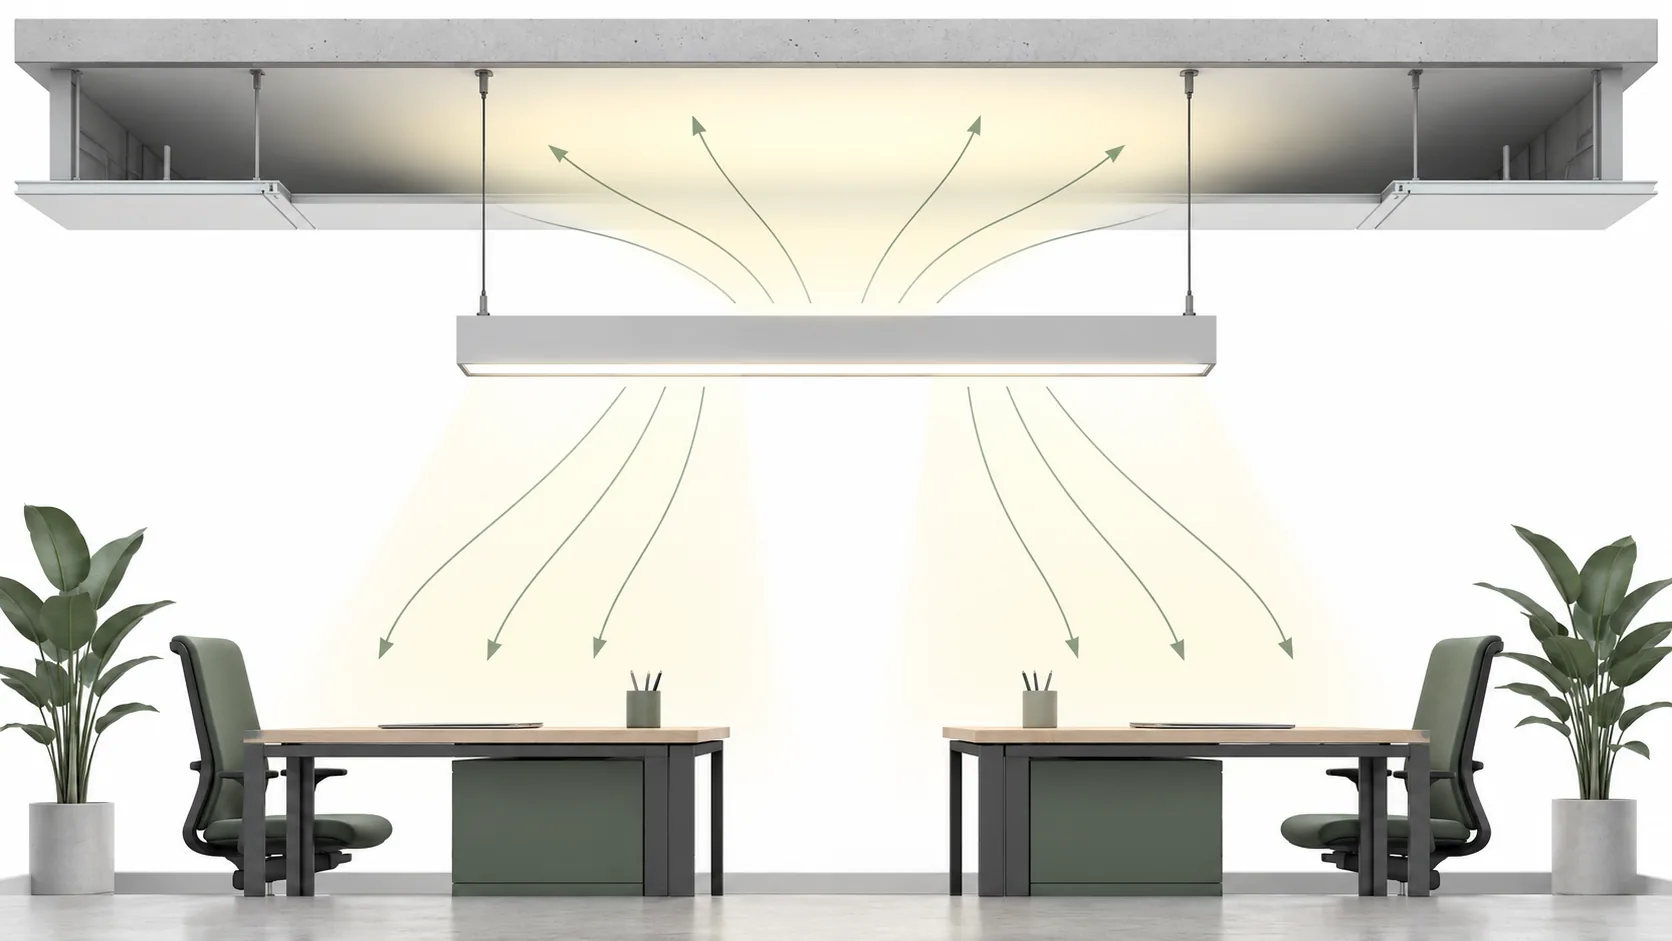
The downward component sends light toward desks, circulation routes and other task surfaces. The upward component sends light toward the ceiling, which becomes a broad secondary reflecting surface. When the ceiling is light-colored and unobstructed, that reflected light can soften the visual contrast between bright fittings and a dark upper room. A poorly chosen ceiling, however, can absorb much of the uplight or create patchy bright areas.
This is why direct–indirect lighting is usually discussed as a system, not as a property of a single fixture. Two products with the same nominal wattage may look different because their up/down split, optics, suspension height and ceiling context differ. Ask for separate photometric information for the exact configuration rather than treating a brochure photograph as a prediction.
Start with the ceiling, not the luminaire
Before selecting a pendant, document the ceiling height, material, color, reflectance if known, exposed services, sprinklers and any acoustic rafts. A smooth pale ceiling is a more reliable uplight surface than a dark exposed deck. If the ceiling is black, heavily ribbed or crowded with ducts, you may still use an up–down fitting, but the uplift may not deliver the intended visual benefit. In that case, compare a controlled direct-only option or a different mounting strategy.
Check the clear distance between the luminaire and the ceiling. A fitting hung very close to the ceiling may produce a narrow, uneven bright strip; too far below it may interfere with sightlines, partitions and maintenance access. There is no universal suspension distance that fits every room. Model the actual ceiling geometry and view a sample in a representative bay.
Also note the position of tall storage, screens and partitions. A lighting model based on an empty open office can overstate the usefulness of reflected light once the furniture plan changes. For refurbishment projects, obtain the latest reflected ceiling plan and furniture plan before locking the run positions.
How should the uplight and downlight balance be chosen?
There is no fixed percentage split that is right for every office. The downlight needs to support the tasks below; the uplight should make the room comfortable without washing out a screen-heavy environment or wasting energy into an unsuitable ceiling. The right balance can vary between a desk area, meeting room, circulation route and reception zone.
Ask the supplier three separate questions: Can the two directions be switched or dimmed independently? Is the stated output for the whole luminaire or one channel? Does the photometric file match the exact driver and optic being quoted? If independent control is required, confirm the wiring, control addresses and emergency-lighting interface in writing. A product described as “dual emission” does not automatically provide two independently controllable channels.
In daylight-rich perimeter zones, the uplift may be less useful during some hours while the task lighting below still matters. Controls can make a design more adaptable, but only if the actual driver, sensor and commissioning plan are compatible. The practical comparison is not simply “more uplight versus less uplight”; it is the required task performance and room appearance across the operating day.
Control glare at the work surface and in the field of view
Office glare discussions often collapse into a single advertised UGR number. That number is not a guarantee for every desk position or room. Optical shielding, luminaire spacing, viewing direction, surface reflectance and the observer’s position all affect the result. The direct component can use different louvers, diffusers or lenses, and those options may trade visual comfort against output or distribution.
Review the actual photometric file, not merely the fixture family name. Identify screen locations, seated viewing directions and high-contrast sightlines. A reflected ceiling can help the room look balanced, but it does not rescue a direct optic that places a bright aperture in the user’s view. Equally, an aggressively shielded optic may leave the desk pattern too uneven if runs are spaced too far apart.
For a broader discussion of workspace layout, see our office linear-lighting worked example. Use it as a planning example, then recalculate for your ceiling height, desk grid and selected luminaire.
Plan runs around the room and the service strategy
Long continuous light lines look simple in a rendering. On site, every run has a feed point, joints, suspension points, driver locations, end caps and a tolerance stack. Draw a complete run schedule before ordering: start and end coordinates, segment lengths, mounting height, feed location, control zone and spare components. Ask for a joint sample if the visible line must appear seamless.
For open offices, align light with the task layout rather than automatically following every ceiling tile or window mullion. A perfectly symmetrical ceiling composition can still be poor task lighting if desks are later rearranged. The design should tolerate reasonable furniture changes without leaving large dark zones or an excessive number of unused luminaires.
Decide how the system will be serviced. If a driver fails, can the service team reach it without dismantling a whole run? Are LED boards, diffusers and connectors available as documented replacement parts? Will a replacement segment retain the same color appearance as the installed line? Our guide to driver access in continuous linear runs covers the maintenance questions in more detail.
What should go in the specification and RFQ?
A good request for quotation gives suppliers enough information to propose the right build without pretending that an unapproved option is standard. The table below separates project inputs from the evidence to request back.
| Project input | Supplier confirmation to request |
|---|---|
| Ceiling plan, finish and mounting height | Installation drawing, suspension range and a suitable photometric file |
| Desk layout, screen orientation and target work areas | Direct optic option and calculated task-area distribution |
| Desired ceiling appearance | Uplight distribution and exact up/down channel configuration |
| Controls and daylight strategy | Driver type, dimming protocol, channel behavior and commissioning notes |
| Run lengths and feed points | Segment schedule, connectors, electrical limits and visible joint sample |
| Maintenance expectations | Driver and module access method, replacement-part list and identification labels |
If a submittal package is required, request the current datasheet, installation drawing, photometric file, wiring diagram, sample approval record and relevant test documentation for the exact variant. Our commercial lighting submittal checklist provides a broader procurement view.
How to test a sample before a rollout
A sample should answer the questions that a PDF cannot. Install it at the proposed suspension height under a representative portion of the actual ceiling. Inspect both the ceiling wash and the task-area light. Look at the fitting from seated positions, corridor approaches and the far end of the run. Test each control scene, not just full output.
Compare the sample with the approved specification: finish, body length, end cap, optical surface, connector, driver, label and packaging. Photograph the installation and record the configuration code. If the design relies on a particular low-glare optic or independent up/down control, those details must be part of the approved sample and purchase order. Do not substitute an apparently similar unit without checking its optical and electrical behavior.
During the first installation, verify the suspension geometry and cable routing with the contractor. A good product can still look poor when the feed cable hangs visibly away from the suspension line or the joining tolerances drift along a long run. The commissioning record should show which segment, driver and control zone belongs to each location.
Review the scheme with two realistic operating scenarios
One lighting simulation is rarely enough for a flexible workplace. Ask the designer to show a normal occupied day with daylight available and a late-afternoon or evening scene with little daylight. The office may feel excellent in a bright rendering yet reveal an overly dark ceiling after sunset. Conversely, a scheme that relies on full uplight all day may be wasteful near large windows. Two scenarios make those trade-offs visible before procurement.
For each scenario, inspect more than the average illuminance. Look at the lowest task areas, the visual rhythm of the ceiling, contrast around screens, circulation routes and the faces of people in meeting zones. Identify the workstations most likely to see a bright fitting in their normal seated view. If the furniture plan is uncertain, test a plausible alternate desk arrangement, not an unrealistically empty room.
Controls should be described as behaviors rather than a list of parts. Write down what happens when somebody enters, when daylight rises, when the space is unoccupied and when the cleaner or maintenance team needs full light. If a shared dimming command changes both up and down together, verify that the scene still meets the task need at each setting. If separate channels are specified, make sure the installer and commissioning engineer receive a clear channel schedule.
Finally, compare the mock-up with the calculation. Record any differences in ceiling color, desk finish, installed height, optical insert or driver setting. Updating the model after a sample is not a failure; it is the purpose of testing. The approved scheme should be based on the actual configuration that will be ordered, not on whichever file happened to be available at the start of the project.
Common mistakes to avoid
- Specifying by wattage alone. Compare the delivered light, distribution and control behavior for the actual space.
- Assuming a dark ceiling will reflect useful uplight. Check the surface and calculate the effect.
- Using a family-level UGR claim as a room-level guarantee. Review the selected optic and room layout.
- Ignoring service access. Plan driver and connector replacement before the ceiling is finished.
- Approving a rendering instead of a sample. A representative mock-up reveals appearance and installation issues early.
Frequently asked questions
Is direct–indirect lighting always better than direct-only lighting?
No. It can improve the visual balance of a suitable room, but it adds little value if the ceiling is dark, heavily obstructed or unsuitable as a reflecting surface. Compare both schemes against the actual task and ceiling conditions.
Can uplight and downlight be dimmed separately?
Only when the selected luminaire, driver and wiring support separate channels. Confirm that capability for the exact quoted model; do not infer it from the term “up–down”.
Does a low advertised UGR value guarantee a comfortable office?
No. UGR depends on the luminaire and the room arrangement. Check the chosen optic, spacing, viewing direction and photometric calculation, then review a representative mock-up.
What file should I request for a lighting calculation?
Request an IES or LDT file for the exact length, output, optic and channel configuration. The file should correspond to the version you plan to buy. Our IES/LDT buyer checklist explains what to verify.
What if the office layout may change?
Favor a run and control strategy that tolerates furniture changes, and document the boundaries of that flexibility. A sample and a second layout scenario can reveal whether the selected spacing remains useful.
The practical next step
Send a reflected ceiling plan, furniture layout, mounting height, control requirements and target market with your inquiry. Compare the proposed up–down linear light against a direct-only alternative using current photometry and a representative sample. That is a stronger specification than choosing a pendant because its brochure says “low glare”.
