 跳到内容

A commercial LED lighting commissioning checklist should verify the result people will use, not just that every luminaire switches on. Adjustable optics need aiming; drivers and controls need testing; a store or hotel needs sensible scenes; and the owner needs records for future service. Missing any of these can turn a good product specification into a disappointing finished space.
This guide covers practical checks for retail, office and hospitality projects. It is not an electrical safety or code-inspection substitute; qualified local professionals must verify those requirements. Use the checklist with the exact drawings, approved samples and products selected for the project.
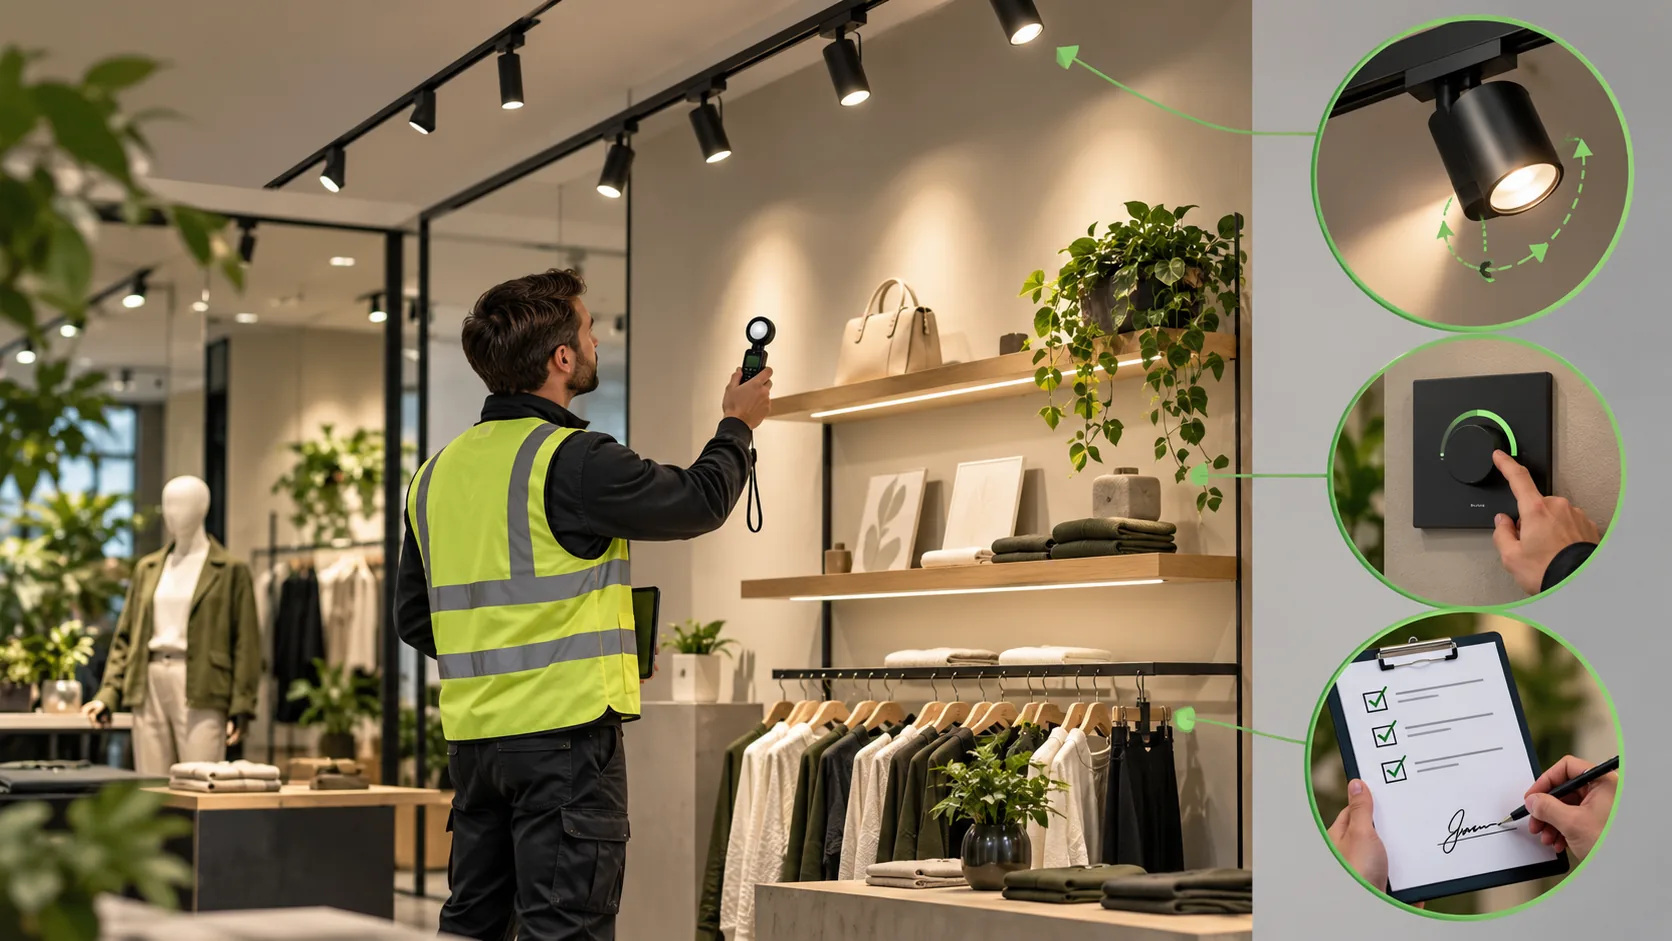
Commissioning starts before the installer arrives
Agree what “complete” means in the design stage. The lighting schedule should identify every fixture type, location, optic, finish, CCT, driver, control zone and any emergency variant. Aiming targets should be shown on plans or elevations. The intended scenes should describe how the space behaves during normal use, not just list percentages without context.
Ask for the approved sample record and latest drawing revision. If a substitution occurred during procurement, make sure the photometric file and control documentation match the installed item. A commissioning engineer cannot confirm a product against a specification that no longer reflects what was purchased.
Plan access. If a fitting is over an atrium, a high shelf or a delicate display, arrange safe access and protection for the area. It is much cheaper to coordinate this with the installation sequence than to return after the space is occupied.
Step 1: identify and inspect the installed equipment
Walk the site with the luminaire schedule. Confirm that the installed family, mounting type, finish, optic and driver correspond to the approved items. Check visible damage, loose trim, misaligned track heads, end caps, suspension heights and feed-cable appearance. Look for inconsistent CCT or brightness within a repeated run.
For track lighting, verify that the adapter is locked into the intended rail and circuit. For linear runs, inspect joints and end treatments. For downlights, check trim alignment and the relationship to ceiling services. Photograph any exception and record its location.
Do not correct a visible defect by changing a control setting unless that is the approved fix. A dimmed mismatched luminaire can look acceptable at one scene yet fail at another. Identify the underlying product or installation issue first.
Step 2: check electrical and control behavior
A qualified person should complete the required electrical tests for the site and destination market. Operational commissioning then checks switching, dimming, scene recall, sensors and any integration with the building control system. Test each zone individually before testing the whole-room scenes.
Observe start-up, fade, low-level behavior and any unwanted flicker or audible noise under actual controls. Check what happens after a power interruption. If there are separate uplight and downlight channels, verify that the correct controls operate each. If the project uses circuit-selectable track, record which heads belong to which circuit.
Emergency lighting, where required, needs its own compliant design, testing and documentation. Decorative scene testing cannot stand in for the local legal procedure. Keep those records with the handover package.
Step 3: aim the lights at the intended targets
Adjustable heads should be aimed from a written schedule, not by eye alone from a ladder. Mark the target surface or object and view it from the customer or occupant position. For a retail wall, check the full merchandise area and glare from the aisle. For a hotel feature, check approach views and any reflections. For an office task area, check the work plane and screen sightlines.
Change one fixture at a time and then review the combined scene. It is easy to make one display bright while leaving a dark gap beside it. Record final head orientation or take a clear photo from a repeatable position. For chain stores, a visual aiming guide helps future staff reset heads after merchandise changes.
Where a linear track light such as the LL1615 adjustable LED linear track light is used, test the intended coverage of shelves or produce faces, not just the floor below. The exact aiming range and distribution should be checked against the supplied variant.
Step 4: measure what matters
Measurements should correspond to the design brief. Depending on the space, that might mean a desk plane, reception counter, vertical display, circulation route or a representative wall. Record measurement locations, control scene, ambient daylight condition and instrument details. A single maximum reading under a luminaire does not describe the whole space.
Compare measured results with the agreed design criteria, allowing for the method and conditions specified by the project team. If the result differs, check aiming, output settings, fixture variant, installation height and surface finishes before blaming the light source. Changes to furniture and merchandise can also change the useful light.
Use visual review alongside measurements. A lux meter does not fully describe glare, reflections, color appearance or the hierarchy of a hospitality scene. Ask the people who will work in the space to identify uncomfortable or poorly lit positions.
Step 5: test every operating scene
Test daylight and evening conditions where possible. Confirm normal occupied, after-hours, cleaning and any promotional scenes. Check that sensors have sensible timeout and response behavior and that staff can override scenes where permitted. The system should not leave customers in a dark aisle or staff unable to get task light.
Record the final settings and protect them from accidental changes. A scene that looks right at handover can drift if controls are undocumented or a replacement driver is installed with different defaults. Provide the operator with a short, understandable scene guide.
Step 6: verify appearance and consistency
Walk the space while the intended scenes are active. Look for bright-dark rhythm, wall-wash scallops, mismatched colors, direct glare and fixture reflections in glazing. Inspect linear joints from normal viewing distances. For repeated downlights, look for varying trim orientation or differences in beam shape.
Do this after major furniture and signage are installed. An empty room can hide shadows and reflections that appear when the real space is furnished. If the final fit-out arrives later, plan a follow-up adjustment before practical completion.
A product such as the GT selectable COB downlight should have its final wattage and CCT setting recorded. “Selectable” is not a license for adjacent units to end up at different settings.
Step 7: hand over a serviceable system
The owner needs more than a warranty certificate. Provide as-built drawings, luminaire and driver codes, control addresses, scene schedule, aiming record, replacement-part list, cleaning instructions and relevant test documents. Explain how to obtain matching spares and how to identify the exact variant at a given location.
Demonstrate a realistic maintenance task. How does a technician remove a head, access a driver or replace a module? What tools and safe access equipment are needed? If the answer is uncertain during handover, the operation team will struggle later.
Field checklist
| Stage | Pass question | Record |
|---|---|---|
| Installed item | Does each location match the approved configuration? | Schedule, photos, exceptions |
| Electrical and controls | Do zones and scenes behave as documented? | Test results and addresses |
| Aiming | Are the intended targets lit without avoidable glare? | Target/aiming photos |
| Measurements | Do agreed task and display criteria hold? | Locations, scene and readings |
| Appearance | Are color, joints and finishes consistent? | Visual review log |
| Handover | Can the owner operate and service the system? | As-builts, spares, training |
Make the exception list actionable. Each item should have a location, issue, responsible party, target correction and retest date. A generic “lighting snagging complete” statement is not enough for a large rollout.
Turn the checklist into an acceptance record
A checklist is useful only when it can close issues. Assign a location ID to every exception and describe the observed behavior, the expected result, the responsible party and the retest date. Attach a photograph or measurement where it clarifies the problem. Separate a product defect from a control setting, an aiming issue and a drawing discrepancy; each requires a different correction.
Use representative sampling carefully. Testing one typical bay can establish a method, but it does not prove every unusual corner, high ceiling or special control zone is correct. Identify critical locations for full inspection and explain which repeated units will be sampled. Recheck the affected locations after corrections and record the final status.
At handover, the owner should receive both the completed checklist and a short list of accepted deviations. This avoids a future maintenance team discovering that a visibly different optic or scene was quietly treated as normal during construction.
Common mistakes to avoid
- Testing only at full brightness. Low dimming levels and scene changes can reveal problems.
- Aiming before final merchandising. Revisit after the actual targets are installed.
- Using one measurement as proof of a whole room. Check the relevant planes and positions.
- Leaving settings undocumented. Record control addresses, CCT and output selections.
- Confusing operational commissioning with legal safety testing. Qualified local checks remain necessary.
Test a realistic failure and recovery
Commissioning should include one simple fault scenario where the project permits it. If a driver is replaced, does the control system recognize the new unit? If a track head is removed and reinstalled, does it return to the correct circuit and aim? If a control scene is reset, can the site team restore it from documentation? These exercises reveal whether the handover package is genuinely usable.
Choose a safe, non-disruptive test under the supervision of qualified personnel. Record the steps, time required and any missing tools or credentials. The goal is not to cause a fault for its own sake; it is to verify that a normal future service event will not leave a prominent display dark for days. Add the recovery procedure to the owner’s operating instructions.
Where a system uses many identical-looking drivers or heads, label them by location and configuration. A replacement that fits mechanically but has the wrong dimming behavior or optic can pass a quick switch-on check and still fail the intended scene.
Frequently asked questions
When should lighting commissioning happen?
Plan it before installation, test the system after installation, and perform final aiming and scene review when the main furniture or merchandise is in place. Some projects need a later seasonal or post-occupancy adjustment.
Do I need measurements if the room looks good?
If the project has agreed task or display criteria, measure them with a documented method. Visual review and measurement answer different questions and should support each other.
Who should aim track spotlights?
A competent installer or lighting commissioning professional should follow the approved aiming plan, with the designer or owner approving the final visual result. Staff can later make controlled merchandising adjustments if trained.
What is the minimum useful handover package?
At least provide as-built fixture locations, exact configuration codes, control scenes, aiming records, relevant test documents, warranty terms and spare-part information.
Can I copy the same checklist to every store?
Use a standard checklist, but adapt target positions, track systems, controls and local requirements. A repeatable process is valuable precisely because it records each site’s differences.
Practical next step
Before the next rollout, create one location-based checklist from the approved drawings. Test one representative store or bay, update the method, and use that record as the baseline for later sites. The best outcome is a system that looks right on opening day and can be restored to that state after years of normal use.
