 跳到内容

Hotel lobby LED lighting design works best when the space is treated as several connected experiences rather than one uniformly bright room. Guests must find the entrance, read faces at reception, see the floor and steps, recognize architectural features and settle into a comfortable lounge. Downlights, linear luminaires and accents can each do part of that work, but the layers need a coherent control and maintenance plan.
This guide is for hotel developers, designers and procurement teams comparing fixture families for a lobby or reception refurbishment. LCB’s GT selectable commercial COB downlight, up–down linkable linear light and wall-washer downlight are examples of distinct roles; their exact options must be confirmed for the project.
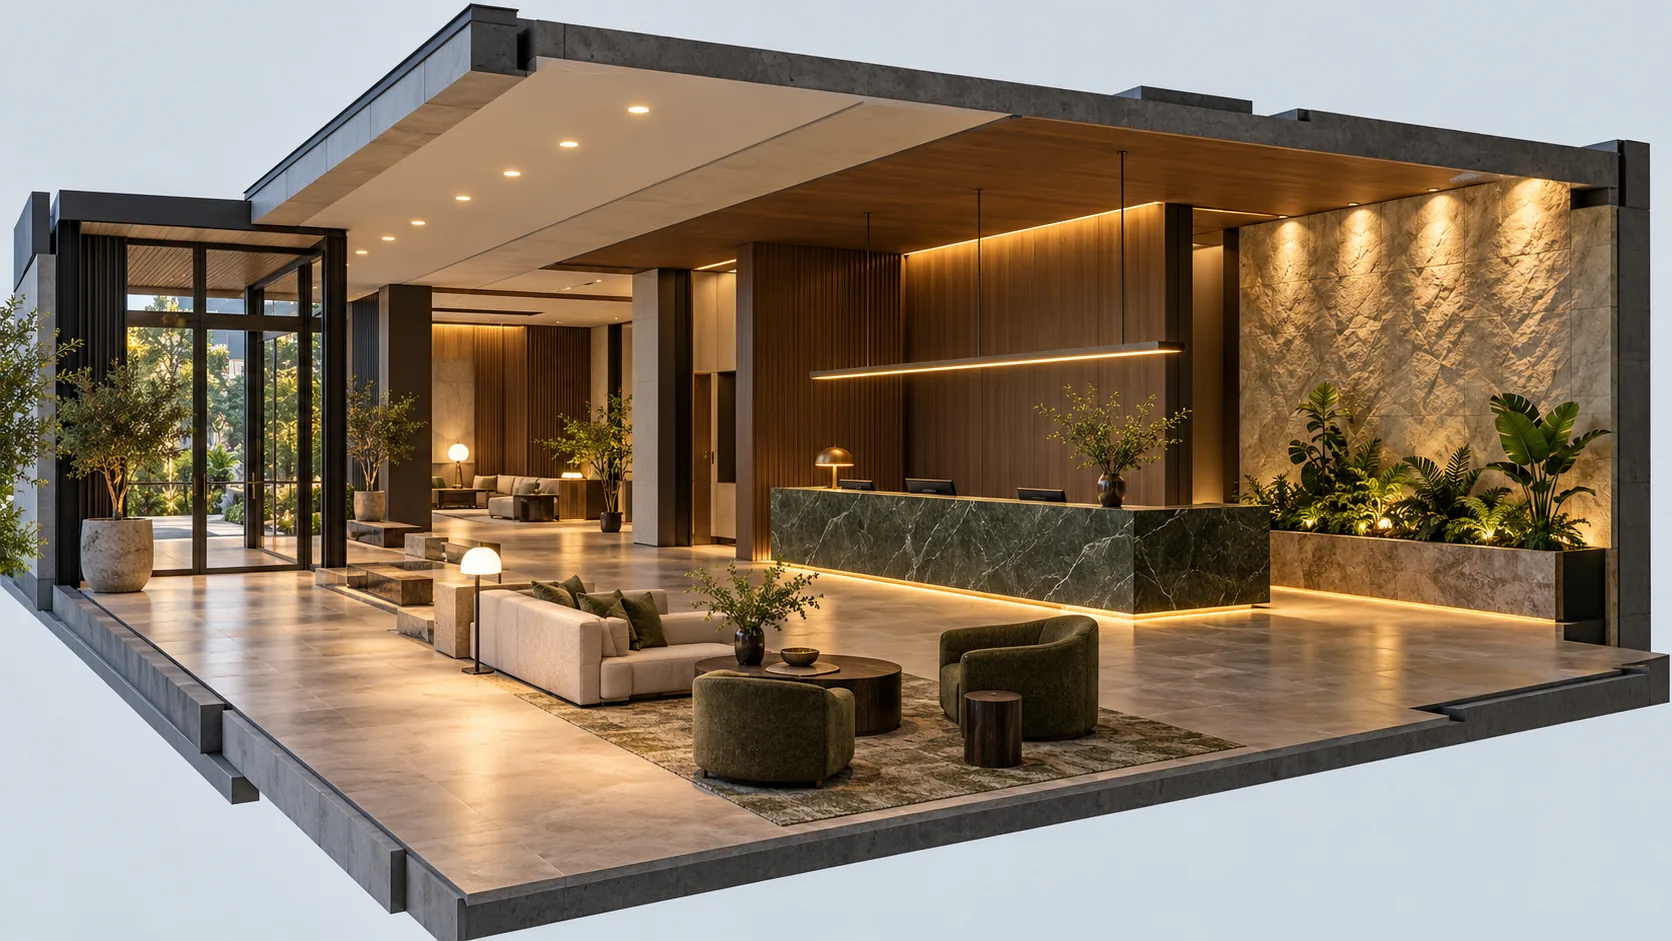
Map the guest journey first
Stand at the exterior approach, then walk through the door to reception, waiting area, lift and corridor. At each point, ask what a guest needs to see and how the space should feel. The reception desk may need clear light on faces and documents. The route to lifts needs legibility and safe navigation. A feature wall or artwork may deserve emphasis. A lounge should feel relaxed rather than like a conference room.
Mark those zones on one plan with their hours of use. Many lobbies operate around the clock but not at one brightness. The same physical room might need daytime, evening, late-night cleaning and emergency scenes. A static picture taken at one exposure cannot prove that all of those modes work.
Check the materials. Polished stone, glazing, metal and high-gloss joinery can reflect bright apertures. Dark timber or carpet may absorb light. A lighting plan should include elevations and finish information, not just fixture symbols on a ceiling plan.
Layer one: comfortable ambient light
Ambient light provides the underlying visibility that lets guests orient themselves. It can come from carefully spaced downlights, indirect linear light, concealed architectural sources or a combination. The goal is not to light every surface identically. The goal is to avoid confusing dark routes while preserving the intended hospitality atmosphere.
Downlights are often useful for routes, desk approaches and localized general illumination. Choose their beam and placement around the actual ceiling height and furniture, not by wattage alone. Excessive rows of downlights can create a dotted ceiling and uneven pools on the floor. Too few can make faces and vertical signs hard to read even when the floor seems bright.
Direct–indirect linear lighting can soften the upper room when the ceiling is suitable for reflection. It should be modeled with the actual ceiling finish and suspension height. A dark or obstructed ceiling may make uplight less useful; compare a direct-only or concealed alternative instead of assuming that “up–down” automatically improves the lobby.
Layer two: reception task and face light
The reception desk is where hospitality becomes personal. Guests need to see staff faces, forms, payment equipment and wayfinding without being dazzled by a fitting overhead. Staff need comfortable working light for long shifts. Lighting only the counter surface can leave the person behind it in shadow; lighting only the face can make paperwork difficult.
Coordinate desk lighting with joinery, screens, signage and camera positions. A linear pendant over the desk can create a clear focal line, but its height and optics must be checked from both guest and staff viewpoints. Alternatively, controlled downlights can provide task light while a separate wall treatment shapes the backdrop.
Mock up the desk if it is a central design feature. Test the real materials and viewing positions. Observe a staff member standing and seated, the surface of a screen, and any reflective stone countertop. A small change in fixture location or beam can substantially alter the face and screen reflections.
Layer three: vertical and focal accents
People read a lobby largely through vertical surfaces—walls, signs, columns and faces. A carefully lit backdrop can make the space feel finished without raising every ambient fixture. Wall washers can give a long wall more consistent brightness; adjustable accents can highlight a sculpture or artwork. The optical job is different, so specify each layer for its target.
Do not aim a narrow spotlight at a broad wall and expect a smooth wash. Conversely, a uniform wall wash may lack the hierarchy needed for a small artwork. Use elevations to show exactly which area should be bright. Include artwork dimensions, mounting height, wall finish and likely guest approach.
Check glare along the route from entrance to lifts. A fixture that looks discreet from the seating area might be in direct view from the doorway. Review all major sightlines before the ceiling positions are fixed.
Choose color appearance as a whole-room decision
Hotels often want a welcoming tone, but no single color temperature works for every brand, material and daylight condition. Sample candidate options against the actual stone, timber, upholstery and artwork. Verify that adjacent fixture families appear coherent. A downlight and linear pendant with nominally similar CCT can still look different because of optical surfaces and color tolerances.
If the project specifies tunable or selectable CCT, decide who is allowed to change it and how that setting is recorded. A selectable product does not replace a design decision; it can become a maintenance problem if one unit is inadvertently set differently from its neighbors.
For multi-property rollouts, approve a physical sample and a visual reference bay. Keep a record of the final CCT, optic, finish and driver settings for every location. This is more reliable than relying on a generic catalog photo to communicate the brand standard.
Controls: day, evening, night and service
Define scenes by what the guest and staff should experience, then assign each fixture group. A daytime scene may work with daylight from the entrance. An evening scene may emphasize the reception backdrop and lounge. A late-night scene needs sufficient route and desk visibility without making the entire space feel harsh. Cleaning may need a brighter service mode.
Document which controls adjust each layer and what happens after a power interruption. Verify the drivers and control protocol for the exact luminaires. If an emergency-lighting system is required, coordinate it with the relevant local designer and code requirements; an ordinary decorative scene is not a substitute for a compliant emergency plan.
Keep the controls understandable to the hotel team. A sophisticated system that nobody can operate after handover can leave the lobby permanently in the wrong scene. A one-page scene schedule and staff training are worth including in the procurement scope.
Coordinate with architecture and building services
Ceiling space in a lobby is contested by sprinklers, HVAC grilles, speakers, cameras and access panels. Recessed downlights need the correct cutout, thermal clearance and ceiling construction. Suspended linear runs need fixing points, feed locations and cable routes. Wall washers need setback and aiming geometry. Resolve those clashes in coordinated drawings rather than at installation.
Also consider maintenance access. A fitting over a double-height void or above delicate furniture can be expensive to reach. Choose a service strategy before the finish is installed: accessible driver locations, replacement modules, cleaning method and a safe way to reach each fixture.
Mock-up and acceptance
Select one representative area containing a reception task, a route and a vertical feature. Install the exact fixture variants and test at the intended dimming levels. View the scene from entrance, guest queue, desk staff position and lounge. Photograph it with consistent exposure, but approve it in person too.
Check the unlit ceiling appearance, finish consistency and visible connections. Then check the lit effect: floor visibility, faces, counter, sign, wall accent and glare. Record the final aiming positions and control scenes. If the sample reveals a problem, change one variable at a time and update the drawings before the rest of the lobby is ordered.
RFQ checklist
| Project input | Evidence to request |
|---|---|
| Plan, ceiling sections and elevations | Fixture layout, mounting details and photometric files |
| Finish schedule and brand mood | Physical samples of CCT, optic and finish |
| Reception and lounge tasks | Calculated distribution and representative mock-up |
| Operating scenes | Control wiring, driver and scene schedule |
| Maintenance constraints | Access method, spare parts and service drawings |
| Destination market | Applicable documentation for the exact supplied variants |
Do not approve a package based only on product-family names. A project could require several beams, finishes, outputs and drivers within one family. Every quoted item should have an identifiable configuration and matching documentation.
Review the lobby at guest eye level
Ceiling plans do not capture how a guest actually experiences a lobby. Do a walk-through at typical eye level from the exterior approach, the entrance, the queue, the desk, the lounge and the route to the lift. At each point, identify the brightest visible fitting, the faces that need to be read, the signage that must be legible and any reflection in polished finishes. Repeat the walk-through in the primary evening scene, when daylight no longer masks uneven areas.
Pay special attention to transitions. A bright exterior entry can make a dim reception feel dramatic but temporarily difficult to navigate; a very bright lobby can make a corridor seem unwelcoming. The issue is not one universal target level but a coherent sequence of visual adaptation and wayfinding. The designer should test the adjacent spaces together, rather than approving the lobby in isolation.
Document the review with short notes and photos from fixed positions. Those references help the owner retain the intended character after future furniture, art or control changes.
Common mistakes to avoid
- Making the floor bright but faces dark. Review vertical light at reception and wayfinding.
- Using every downlight at full output all night. Plan scenes for actual operations.
- Mixing untested color appearances. Sample fixture families together against the real finishes.
- Placing lights before services coordination. Confirm cutouts, feeds, clearances and access.
- Treating renderings as acceptance evidence. A real mock-up exposes reflections and glare.
Frequently asked questions
How many lighting layers does a hotel lobby need?
There is no fixed number. Most lobbies benefit from a visible route, usable reception task light and selected vertical or focal emphasis. The layers can come from different fixture types or a coordinated combination.
Are selectable-CCT downlights useful in hospitality?
They can make procurement or mock-up comparison more flexible, but the final setting should be specified and recorded. Uncontrolled mixed settings can create inconsistency.
Should a lobby use warm light everywhere?
Choose the appearance against the brand and actual finishes. The more important issue is a coherent room and usable task light, not applying one generic CCT claim.
Can one linear pendant light the reception desk?
It may be part of the solution, but test faces, documents, screens and guest views. Additional controlled light may be needed depending on the desk and ceiling geometry.
What should the hotel receive at handover?
Current drawings, fixture and driver codes, aiming record, control scenes, cleaning instructions, spare-part list and relevant project documentation. These materials help the lobby stay consistent after the opening photo shoot.
Practical next step
Map the guest route and operating scenes before choosing products. Then compare the GT downlight, up–down linear light and wall-washer downlight in a representative bay. Approve the whole scene—people, surfaces, controls and service—not only the individual fixtures.
