 跳到内容

A furniture showroom is not one uniform retail aisle. Sofas, timber tables, fabrics, cabinets, outdoor furniture and circulation paths sit under the same roof but need different visual attention. Large showrooms may have high or exposed ceilings, changing display zones and a mix of daylight and electric light. A track-mounted LED panel can provide broad coverage from an adaptable rail position, while spotlights supply sharper accents where needed. The important question is not whether one fixture type is fashionable; it is how the layers work together on the merchandise.
This guide is for project teams considering LED track panel lights in furniture retail. It uses a real showroom photograph supplied for this site as application context, but no single image proves the specification or measured result. Exact rail compatibility, optics, wattage and control options must be confirmed for the proposed model. Plan the targets and sample test before deciding fixture quantities.
Begin with the customer path
Walk the likely route through the showroom. Where do visitors first see the displays? Where will they pause to compare materials or sit on furniture? Which circulation areas must remain clear? Sketch the broad zones on a floor plan and note ceiling heights and daylight. The goal is to help customers understand colors, shapes and textures without a sequence of uncomfortable bright sources overhead.
Vertical surfaces matter alongside the floor. A cabinet front, shelf, upholstered back or brand sign may need more useful light than the open walkway. A track panel aimed only at the floor can make the path bright while the merchandise looks flat. Mark the key viewing planes and the changing display locations. If the layout is frequently rebuilt, include extra rail capacity or zones rather than assuming the first arrangement will remain forever.
Furniture can be highly reflective or textured. Glossy tables, glass doors and polished finishes may show lamp reflections; fabrics and timber reveal color under different spectra. Test the proposed light with actual materials. A warm-looking sample in an empty white room is not enough. Buyers should discuss the desired visual hierarchy with the retailer: a comfortable general layer plus selective emphasis often reads better than trying to make every item equally bright.
Where a track panel helps
A track-mounted panel can combine a broader luminous surface with the ability to position the fitting along a compatible track system. It may suit wide furniture bays or circulation zones that need a softer pool than a narrow spotlight. However, products vary widely in panel size, distribution, tilt and driver location. Ask for the exact photometric file and drawing rather than assuming all “track panels” behave alike. Check whether the intended adapter fits the existing rail and circuit configuration.
A panel’s visible area can influence comfort. A larger luminous surface may appear less concentrated than a small point source at the same useful output, but glare still depends on brightness, angle, mounting height and sightline. View the proposed fixture from seated eye level as well as standing routes. A furniture shopper spends time sitting and looking around; this makes low viewing angles especially important. Install a sample where people can test this experience.
A track panel is not a replacement for every accent. A small decorative item or sign may need a spotlight. A tall wall of cabinets may require vertical lighting. In a high, daylight-rich showroom, the control system may need to balance zones through the day. The panel is one tool in a layered plan, not a universal answer.
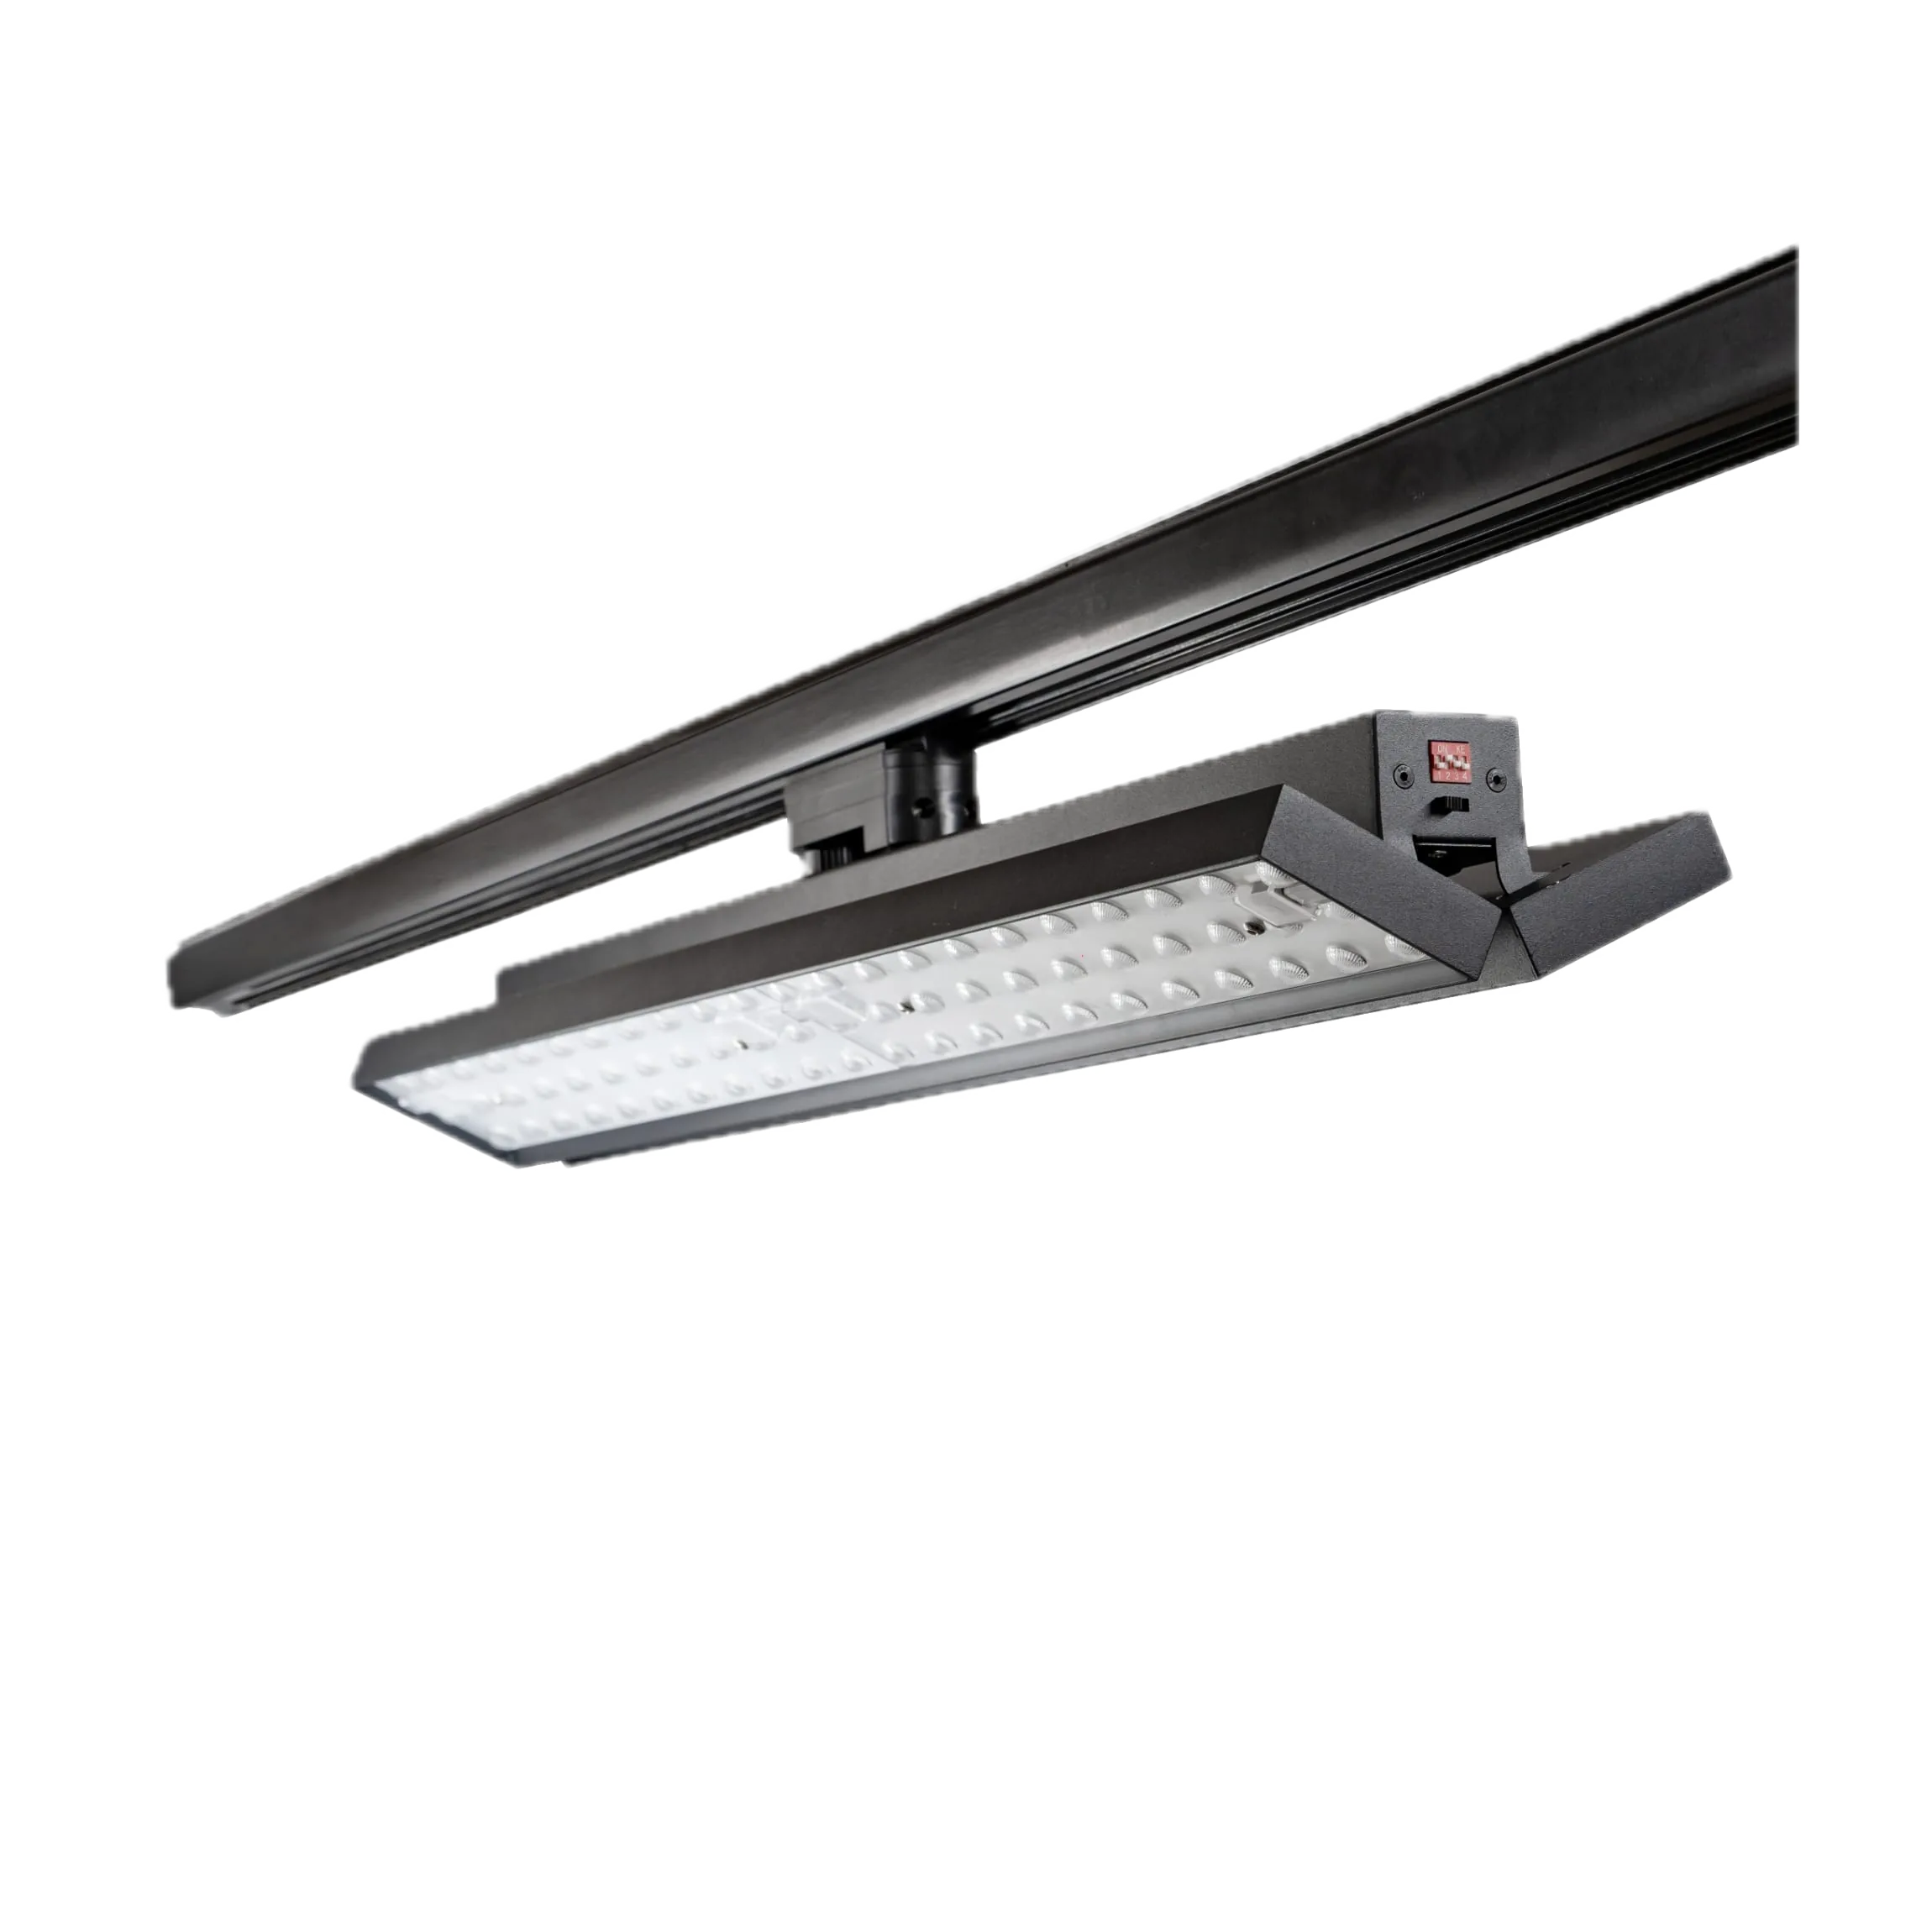
The product photo helps identify the fixture form. The exact rail adapter, output and adjustment range must be verified on the proposed sample.
Use the showroom photograph as context, not proof
The furniture-showroom photograph shows broad display bays, circulation and visible ceiling infrastructure. It is useful for discussing where broad lighting and accents might be placed. It should not be presented as a measured case study unless the project has documented light levels, product configuration and customer permission. Use it to ask better questions: Which areas receive daylight? Which furniture surfaces face visitors? How much can the display move? Where can the rail be supported and powered?
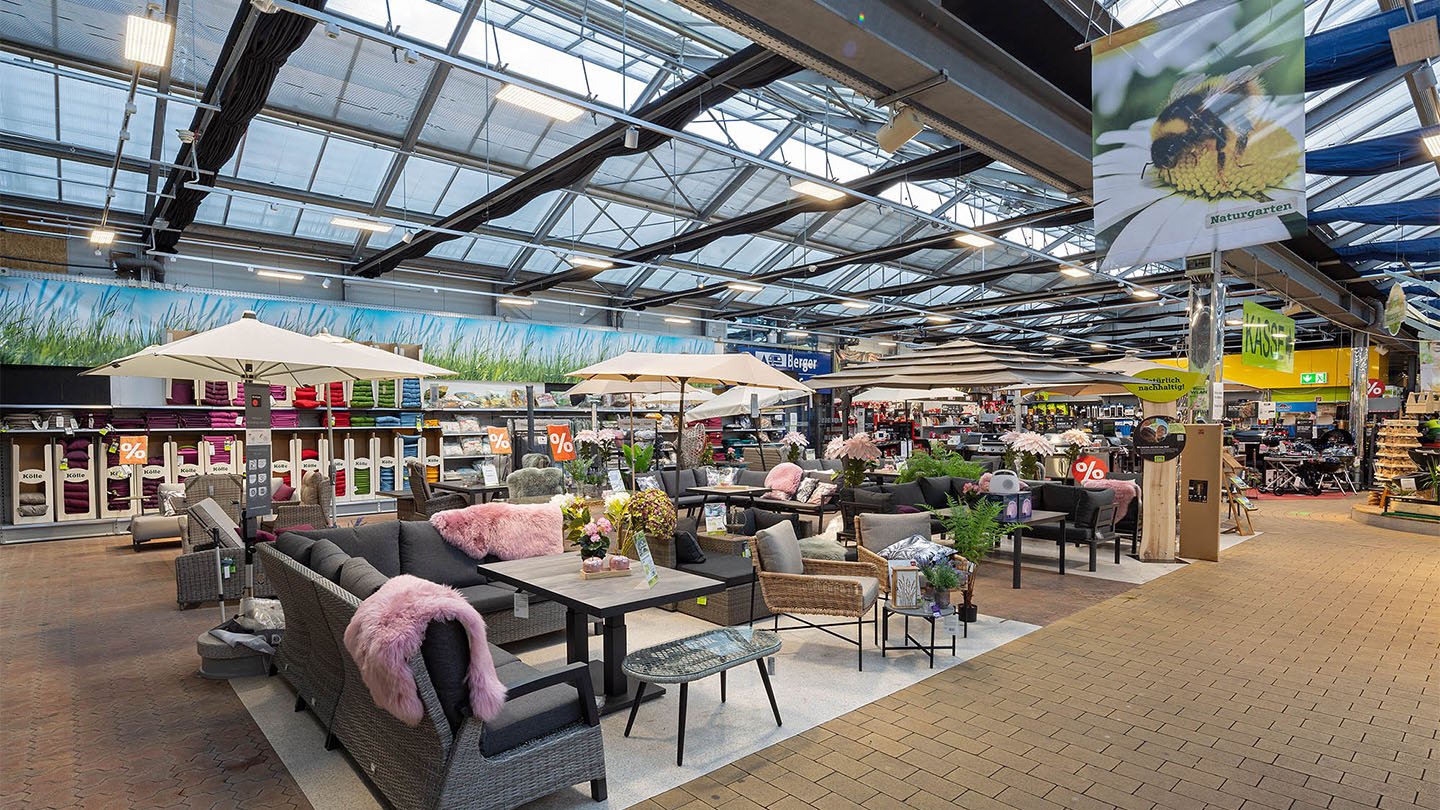
At the design stage, photograph the actual proposed site from customer eye level. Mark display zones, rails, structural members and likely fixture positions on a plan. A reference image can spark layout ideas but cannot replace a site survey.
Check rail and adapter compatibility
The word “track” does not mean universal interchangeability. Confirm the rail profile, circuit arrangement, voltage, current and the exact adapter used by the panel. If existing track is being reused, identify its manufacturer and model where possible. Photograph an end cap and adapter, but do not rely on visual similarity alone. An electrical and mechanical compatibility check by qualified personnel is essential before ordering multiple fixtures.
Also check how power and controls are arranged along the rail. A showroom may want daylight-responsive zones, separate scenes for seasonal displays or dimming of broad background light without changing the accents. The rail’s circuit structure and the chosen driver determine what is possible. If the requested controls are unavailable on the existing system, the project may need a rail change or a different luminaire strategy.
Track loading and support should be checked for the real ceiling. Panels can have different size and weight from the small spotlights already installed. Verify allowable loading, suspension or surface fixing, and the position of supports. An attractive drawing is not structural approval. Keep the qualified designer and installer responsible for project-specific electrical and fixing decisions.
Decide how the lighting layers share the work
Assign the broad layer to safe circulation and general merchandise visibility. Then use more directional accent light where the display benefits from emphasis. This does not mean the general layer has to be flat or the accents dramatic. The desired balance depends on brand character and product type. A living-room vignette may feel welcoming with a softer ambient base; a premium feature item may need carefully controlled contrast. The scene should be evaluated from the visitor route.
Test the vertical display and seated viewing positions. A ceiling arrangement that looks good in a plan can put direct glare into the eyes of someone testing a sofa. If a panel can tilt, confirm the actual range and whether tilting reveals the source at a problematic angle. If it is fixed, verify the selected beam and rail position. Look for bright patches on glossy tabletops and dark faces on cabinets. Make small adjustments in the sample zone before replicating the pattern.
In mixed daylight environments, identify periods when windows add light and when electric lighting carries the whole scene. A dusk test can be especially informative, but the site may need measurements and specialist design beyond a simple sample. Record the scene settings used during approval so a later installer does not commission every panel at full output by default.
Select color and rendering with actual materials
Furniture displays include timber, fabric, leather, glass, metal and printed price information. View the proposed CCT and color-rendering option against a representative sample set. Check whether neighboring luminaires make the same fabric or timber appear different. Avoid assuming that a nominal CCT value alone guarantees visual consistency; the full spectral and optical combination matters. The supplier should provide suitable product data, and the retailer should approve the appearance on the real merchandise.
Where the brand expects a particular warm or neutral atmosphere, specify it in the fixture schedule and mock-up. If a selectable product is used, document the final switch setting. Settings hidden in the housing can be changed accidentally during maintenance. Label cartons and keep a commissioning record. Across a large showroom, small differences repeated many times can be noticeable.
Plan for changes and maintenance
One reason to use a rail-based system is the ability to respond to revised display zones. Define what changes are allowed after handover. Can staff move fixtures safely, or must a qualified electrician handle them? How will new positions be checked for glare and rail loading? Is there enough spare cable or rail capacity for expansion? A “flexible” system without an operating process may become a collection of ad hoc patches.
Keep spare adapters, drivers or whole fixtures according to the manufacturer’s service model. Record rail type, fixture revision, optic, finish, CCT, control setting and installed location. A replacement panel may fit the track but produce a different distribution or color. For multi-store buyers, agree a sample comparison procedure whenever the supplier changes a component.
Cleaning matters in a furniture showroom because overhead surfaces can collect dust. Ask how the panel should be cleaned and what access equipment is needed at the actual mounting height. Avoid maintenance methods that could damage the optical surface. The fixture should be reachable without disrupting displays unnecessarily.
Build a representative pilot area
Choose one typical furniture bay with a mix of low seating and vertical merchandise. Install the proposed rail, adapter, track panel and any accents exactly as specified. View it from the entrance, main aisle and seated positions. Review merchandise color, shadows, reflection, glare and the transition into adjacent zones. Test all intended scenes or dimming settings with the real controller. A single fixture tested in an empty room will not reveal the full result.
Record the installed positions, rail and adapter codes, fixture versions, beam and color settings, control scene, photographs and observed problems. Adjust the design and repeat the check. The pilot should become the reference for the rollout and for future store teams. Lowcarbon’s product center shows the available lighting families; the track spotlight versus linear track light comparison helps explain when narrower accents may complement a broad layer.
Do not promise a fixed energy saving or sales uplift from a photograph. Such results require baseline data and a defined measurement method. The value of the pilot is that it reduces uncertainty about the installed visual and technical outcome before a larger order is made.
Common mistakes to avoid
- Assuming a panel adapter fits an existing rail because it looks similar.
- Lighting only the floor while cabinet fronts and fabrics remain dull.
- Testing the scheme only from standing height, not seated eye level.
- Relying on one broad panel for all accents and display changes.
- Ignoring reflections from glass cabinets and polished tables.
- Approving a daylight scene without checking evening conditions.
- Failing to record switch, CCT and control settings for replacements.
- Treating a reference photograph as a measured project case study.
Frequently asked questions
Are track panel lights suitable for high-ceiling furniture showrooms?
They can be, depending on mounting height, optic, output and target geometry. Review the exact photometric file and an installed pilot rather than deciding by ceiling height alone.
Can a track panel fit any commercial rail?
No. Mechanical and electrical compatibility must be confirmed for the specific rail, circuit and adapter. Visual similarity is not enough.
Should panels replace all track spotlights?
Usually the better question is how broad and accent layers should share the work. Panels can support general visibility, while spotlights may still be useful for small or changeable features.
What is the most important glare check?
Inspect the installed scheme from the actual customer path and seated positions, at the intended operating settings. A sofa shopper may see apertures that are hidden from a standing planner.
What should a multi-store buyer standardize?
Keep a fixture and rail schedule: adapter, optic, finish, CCT, driver, controls, position and approved sample. Allow site-specific deviations only with a documented review.
Final recommendation
Use track panel lighting as a flexible broad layer in a furniture showroom only after checking rail compatibility, merchandise targets and seated visual comfort. Combine it with accents where appropriate, test a representative bay and document the approved configuration. That gives the retailer a system it can adapt without losing the visual quality of the original design.
