 跳到内容

A modular multi-head COB downlight can put several adjustable or fixed optical heads into one neat ceiling opening. In retail and hospitality projects, that format can make the ceiling calmer than a scatter of separate fixtures. It does not automatically deliver better lighting, though. The number of heads, their aiming range, the optical accessories and the ceiling conditions must be specified around the actual surfaces to be lit. A two-head frame pointed at the wrong targets is still the wrong lighting plan.
This guide is for importers, contractors and project teams comparing one-, two- and multi-head recessed downlight families. It deliberately avoids assuming that every model has the same wattage, cutout, tilt range or control option. Confirm those details against the exact drawing and sample you intend to buy. Start with the visual task, then work backward to the fixture configuration and installation evidence.
Start with targets, not the number of heads
Draw a simple plan of the merchandise, tables, counter or circulation area before selecting a frame. Mark the vertical surfaces people look at, not just the floor. A display wall may need a directional accent while the adjacent circulation zone needs comfortable ambient light. A reception desk may need face visibility and task light. Several heads in one frame can address different targets, but only if their aim and beam options allow it.
For each target, record the mounting position, distance, desired visual emphasis and any reflective material. Do not choose three heads merely because a three-head unit appears to offer more output. More sources can increase brightness without improving the intended surface. Conversely, a single head can be too narrow for a broad display. Ask the lighting designer to assess the complete arrangement, including other luminaires and daylight, before the purchase order fixes the ceiling openings.
What one-, two- and multi-head layouts change
A single-head recessed downlight usually has the simplest ceiling appearance and gives one optical direction from one opening. It can be repeated for an orderly rhythm. A two-head frame can support two adjacent targets or combine a narrower accent with a wider contribution, if the selected family provides suitable optics. Larger multi-head frames can consolidate several accents, but their footprint and maintenance access also grow. The frame is an architectural decision as much as a fixture choice.
Do not assume that each head is independently controlled. Some products share a driver or control channel; others may have separate circuits. This distinction changes what can be dimmed, switched or serviced without affecting the other heads. Ask for a wiring diagram and a sample of the exact configuration. If the project needs separate scenes for a window display and nearby aisle, verify that the electrical design actually permits them.
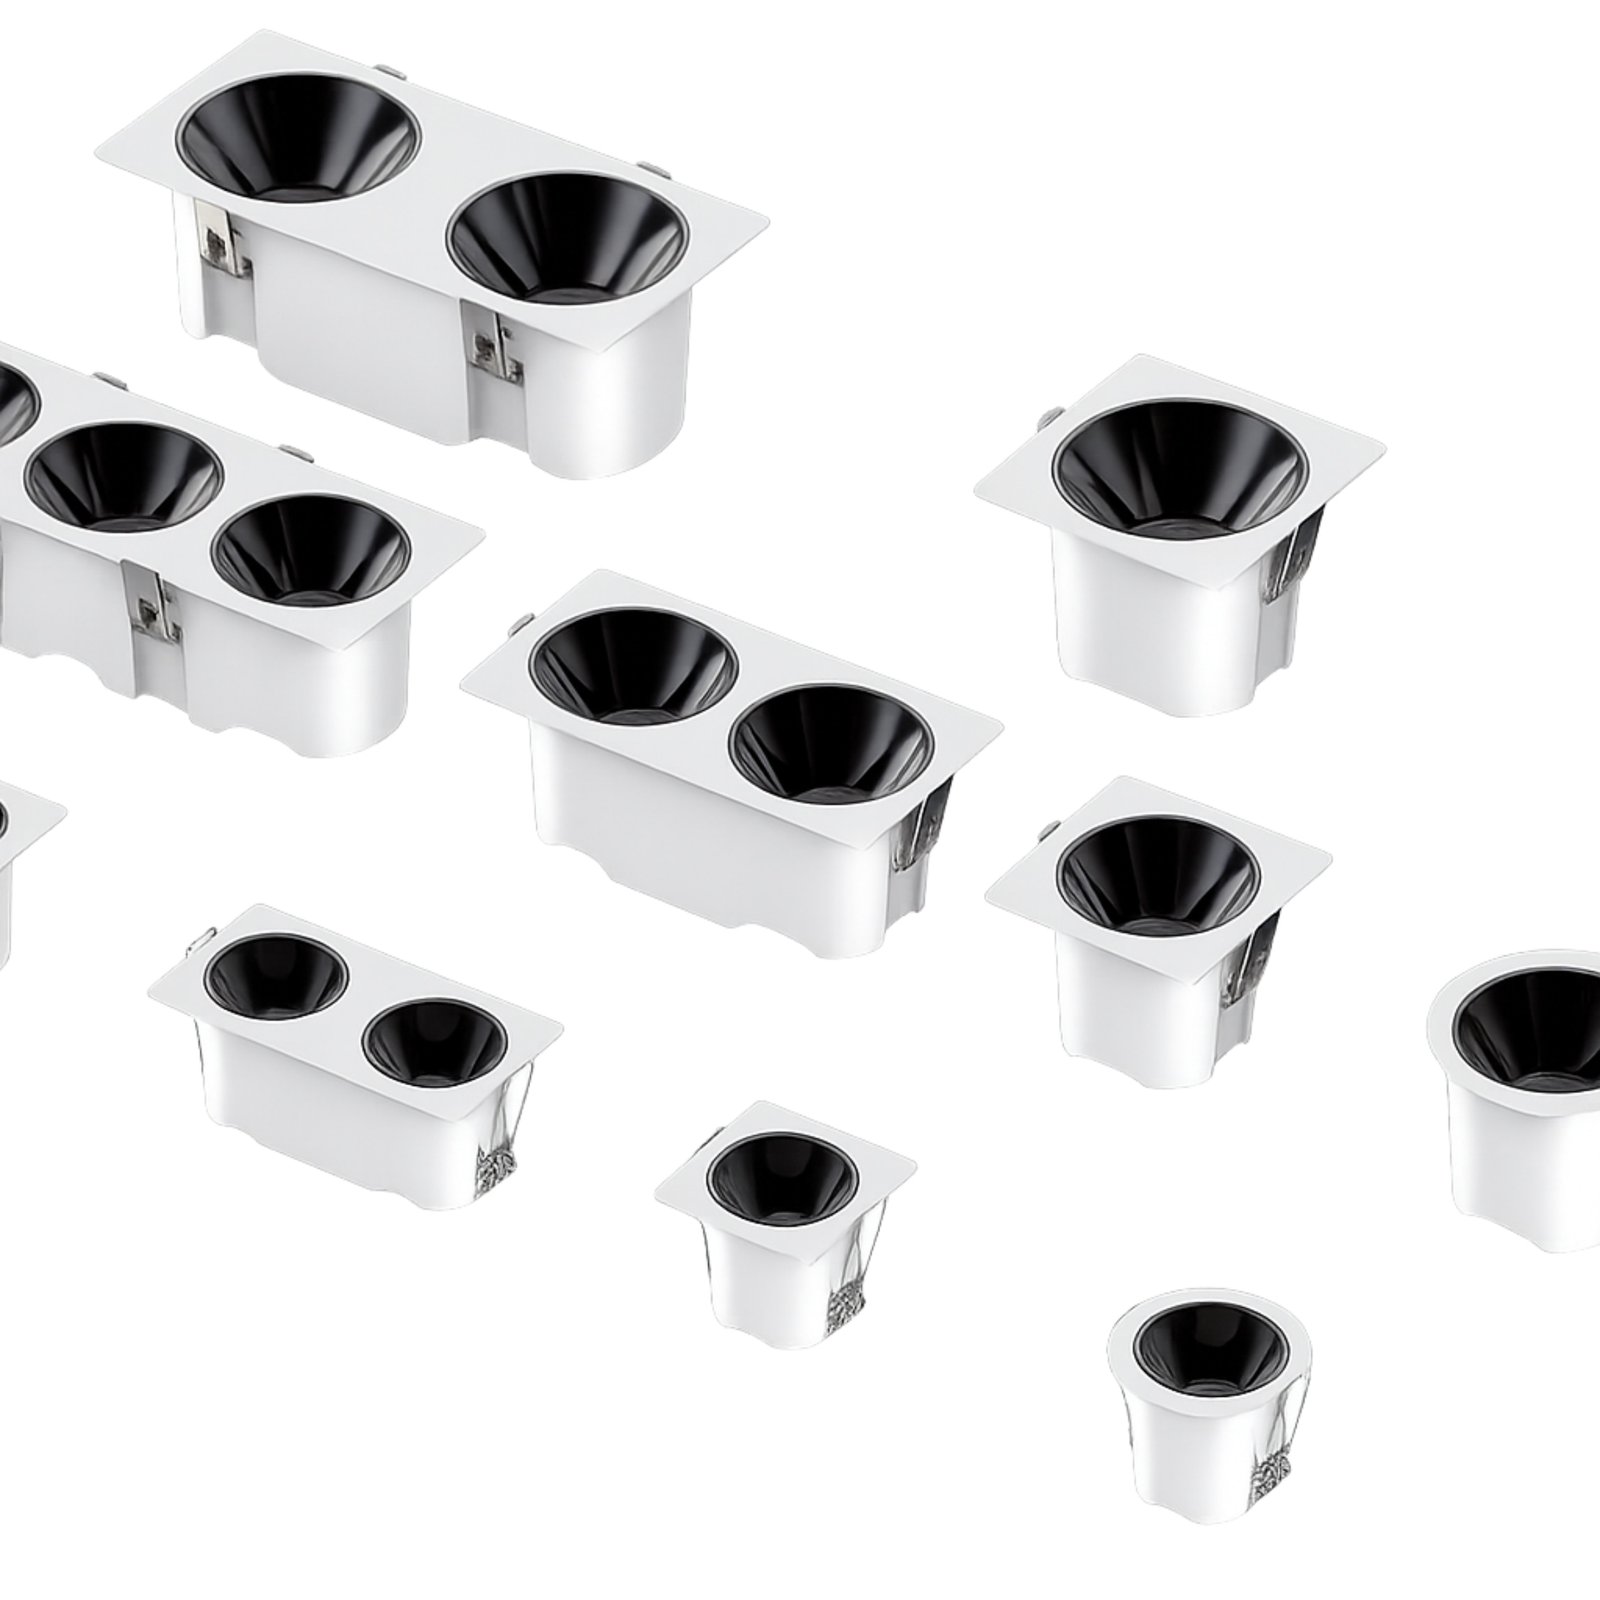
The product-family image helps compare visible frame formats. It does not establish the available electrical combinations for a particular order; those belong on a model-specific drawing.
Match the optical head to the visual task
The aperture alone does not describe the light pattern. Request the beam information for the exact head, lens and reflector combination. A narrow accent may make a small feature stand out but leave a broad wall patchy. A wider beam may improve continuity but reduce contrast at the display. At a similar lumen figure, the illumination on the target can differ substantially because the distribution differs. A photometric file or sample demonstration is more useful than a catalogue photograph for this decision.
If the head tilts, confirm its practical aiming range after it is installed in the chosen frame and ceiling. Theoretical rotation on a table may be limited by the trim, the ceiling thickness or the direction of the heat sink. Review whether the source becomes visible from normal walking positions as the head is tilted. A deep recess can help shield a source, but it may also restrict the useful beam at a steep angle. These trade-offs should be tested on the actual target.
The U.S. Department of Energy’s CALiPER analysis of directional lighting illustrates why beam angle, field angle and distribution plots matter when comparing fixtures. For this project, do not copy a generic beam label from another model. Use the photometric data for the configuration being purchased and check it against a physical sample.
Keep glare under control from real viewing positions
A dark or deeply recessed reflector may look comfortable in a product photo, but perceived glare depends on mounting height, direction, surrounding brightness and where occupants stand. Check the entrance view, the main circulation route and seated views. In a restaurant, a guest may look upward from a table. In a retail store, a shopper may see a tilted head while walking past a display. The same fixture can be acceptable in one position and distracting in another.
Build the mock-up at the planned ceiling height. View the lit display from the places customers and staff actually use. Look for visible LED points, bright reflector edges and unwanted reflections in polished products or glazing. Do not treat a single glare claim as a substitute for that review. The existing guide to glare control in linear track lighting explains complementary concepts, but a recessed grid frame still needs its own application check.
Coordinate the ceiling opening before buying
A multi-head frame may occupy one opening, but it needs enough clear space above and around it. Ask for the exact cutout, outer trim dimensions, recess depth, spring-clip clearance, driver location and installation sequence. Compare these with structural members, ducts, sprinklers, access hatches and ceiling grid modules. If the drawing shows a two-head frame, do not assume the three-head version fits the same opening or has the same driver arrangement.
Confirm the ceiling material and thickness. Spring clips suitable for one board may not be suitable for a thicker decorative panel or a metal ceiling. The luminaire’s weight and any separate driver need appropriate support. A contractor should decide where the serviceable parts can be reached after installation. If the ceiling becomes sealed behind joinery or a continuous finish, a fixture that looked efficient on paper may be expensive to replace later.
The safest ordering step is to cut one pilot opening in a representative ceiling section, install the sample and inspect both the room side and service side. Record any gap, trim shadow or tilt obstruction. Give the supplier the approved drawing revision and actual measured opening, rather than a verbal instruction such as “standard double downlight.”
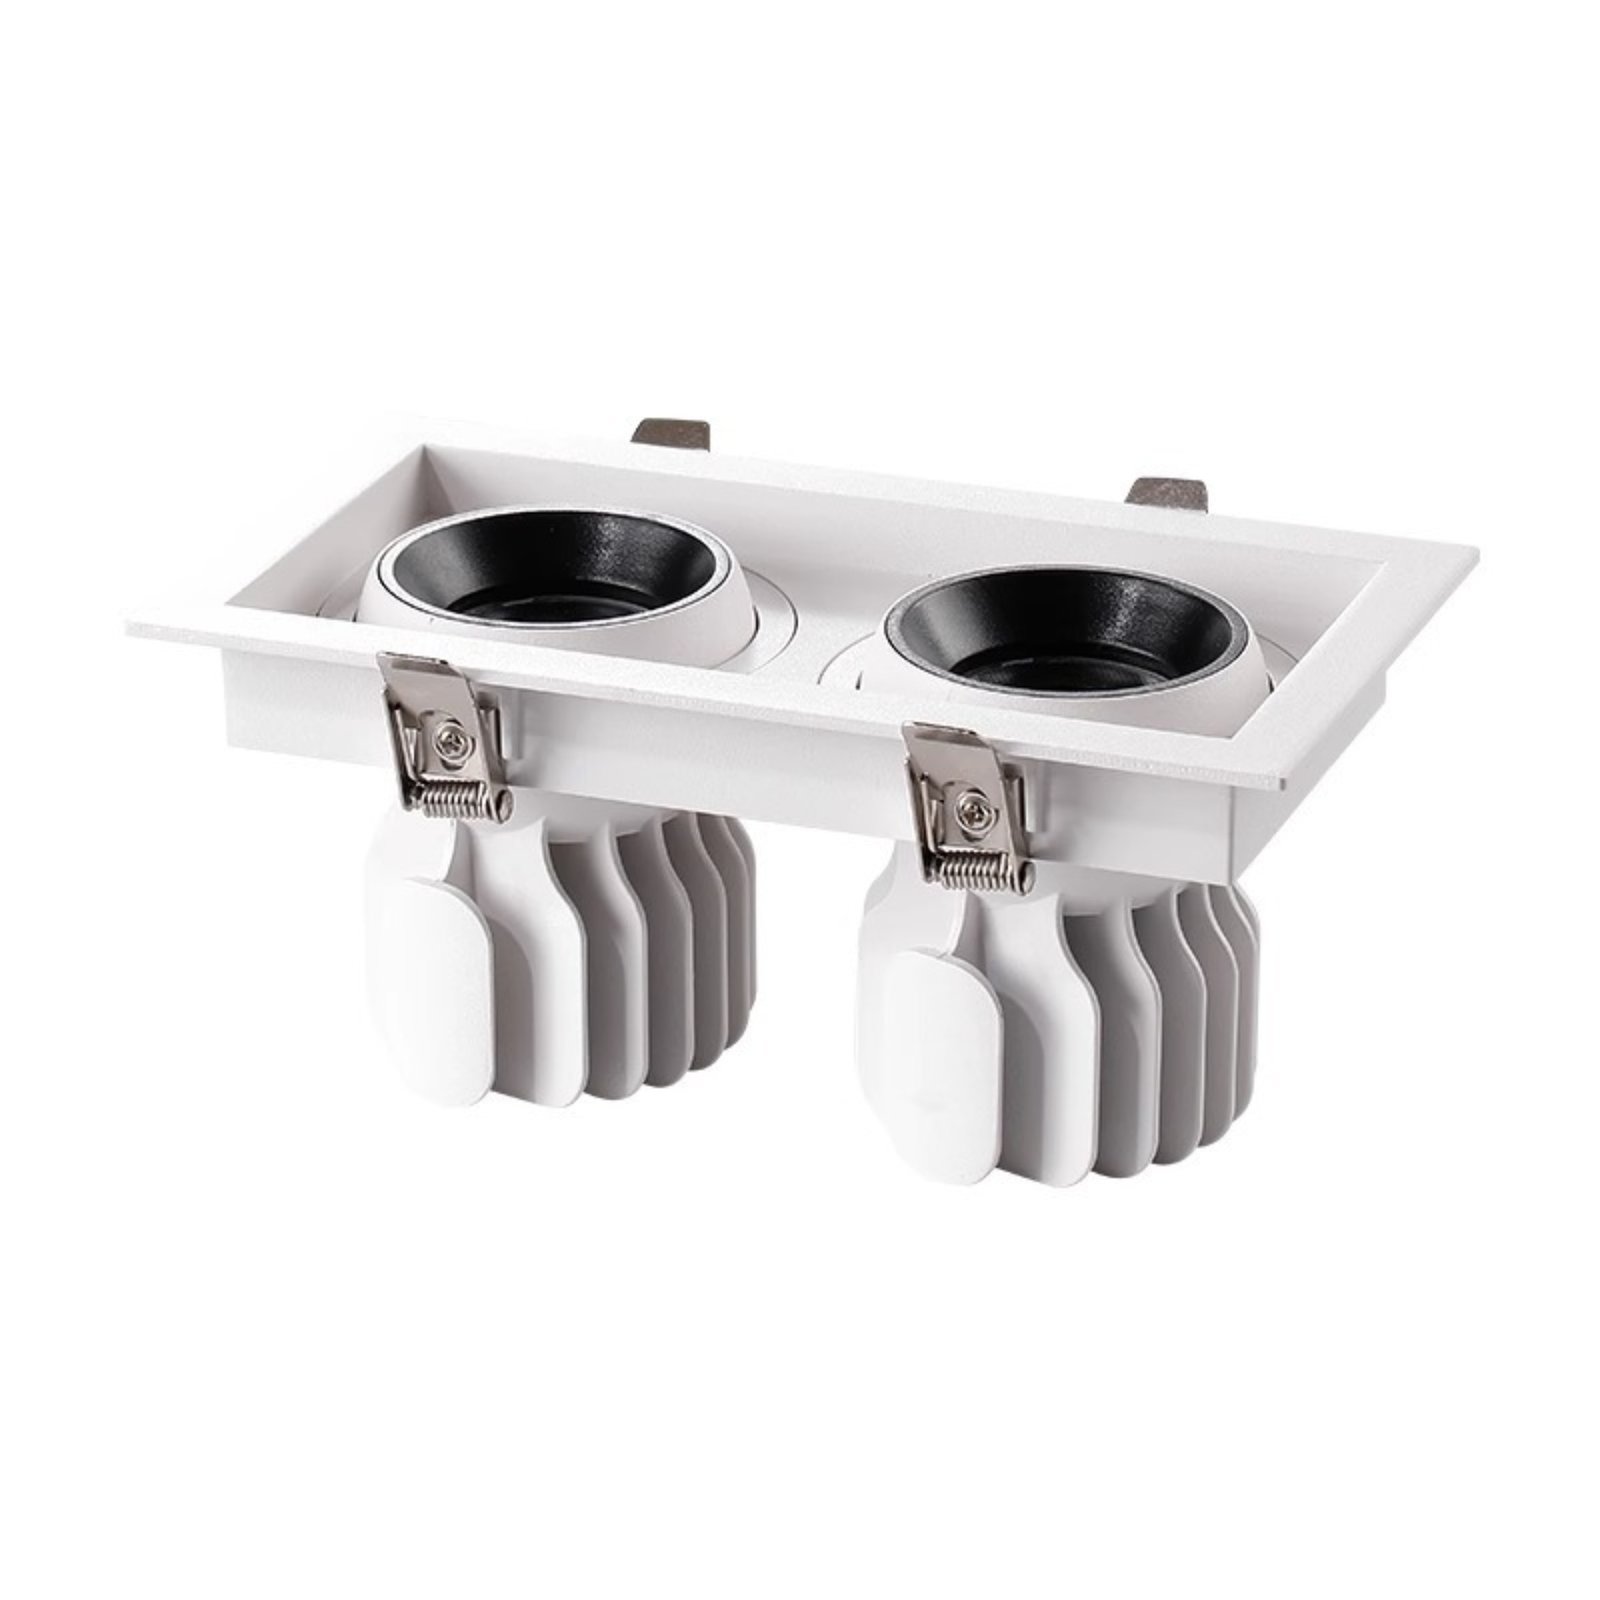
A rear-view photograph helps the installation team discuss clearance. The dimensioned drawing—not the photo—must decide the cutout and required void.
Check drivers, controls and access as a system
The driver determines more than whether the fixture turns on. Verify input voltage, power, dimming interface, operating environment and compatibility with the proposed controls. A control schedule should identify which heads respond together and what happens at the lowest intended dim level. If the order includes several frame sizes, confirm that the driver and control behavior are consistent across them. A sample test with the actual controller is stronger evidence than a compatibility label alone.
Decide whether a failed driver can be reached without damaging the ceiling. If the driver is remote, specify its mounting and cable route. If the product is integrated, ask what component is replaceable and what spare unit should be kept. Emergency lighting, fire requirements and local electrical rules may impose additional project-specific constraints; those decisions belong with the qualified designer and installer, not a generic product article.
For a chain or multi-site rollout, record one approved configuration for each location type. Store the exact head count, frame, optic, finish, CCT, driver, control interface and approved sample reference. The parts may look similar when unpacked, so model codes and carton labels matter. A replacement should reproduce the intended light pattern and color appearance, not merely fit into the same hole.
Color and finish should be approved under the actual scheme
Choose CCT and color-rendering requirements in context with the merchandise or interior finishes. A warm scene in hospitality may need a different visual character from a bright commercial display, but no single CCT is correct for every project. View a representative sample on the actual materials. Compare several heads side by side when they will be seen together. Color consistency is especially important in repeated frames across a ceiling, where one visibly different aperture can distract from the whole scheme.
The frame finish also affects the ceiling. A white trim can blend with a white surface; a black inner baffle may reduce the visible brightness of the aperture. However, appearance in a studio image is not the same as appearance under the project’s ambient lighting. Ask for a physical trim sample and check the finish at the intended viewing distance. If custom colors are proposed, confirm the finish approval procedure and spare-part availability.
Compare installed cost, not fixture price alone
One multi-head frame might replace several individual openings, but that does not prove the total installation is cheaper. Compare the ceiling cutting, wiring, controls, access and future maintenance work. A larger frame may simplify alignment in one project and complicate it in another. The location of structural elements can make one long opening harder than several small openings. Changes in display layout may also favor individually movable luminaires elsewhere in the store.
Ask contractors to price a complete sample installation, not only the bare fixture. Include drivers, adapters where relevant, cable length, dimming components, trims and any required access panel. Include time for aiming and commissioning. A retailer that changes displays frequently should value re-aiming flexibility; a fixed hotel corridor may prioritize a stable, repeatable ceiling rhythm. The decision should be tied to how the space will be used and maintained.
Build a clear sample approval checklist
Before approving a bulk order, compare the physical sample with the quotation and drawing. Record the frame and cutout, the optic installed in each head, the driver label, finish, CCT, power setting and control response. Test the planned aiming range at ceiling height. Review the lit target and glare from several positions. Photograph the accepted arrangement and keep those images with the approval record. If any part changes later, decide whether a new test or sample is needed.
The sample should also demonstrate practical installation. Can the installer connect the driver without overstressing the cable? Can the frame sit flush? Is there room to remove a head for service? Can the approved beam be restored after a replacement? These are ordinary questions, but they determine whether an elegant ceiling design remains manageable after handover. Lowcarbon’s product center gives an overview of commercial lighting families; request model-specific drawings and test information before committing to a particular multi-head option.
Common mistakes to avoid
- Selecting head count from a catalogue page before defining the target surfaces.
- Comparing products with different optics using only total lumens.
- Treating one driver as though every head can be controlled independently.
- Cutting all ceilings before checking a representative frame and access route.
- Assuming a deep recess prevents glare at every viewing angle.
- Ordering replacement heads without recording the approved optic and color settings.
- Using an attractive room rendering as evidence of a tested lighting result.
A short pilot installation can prevent all seven mistakes. The goal is not to make the specification complicated; it is to capture the few decisions that are costly to reverse after the ceiling is finished.
Frequently asked questions
Are two heads in one frame always better than two separate downlights?
No. A twin frame can simplify the ceiling appearance, but separate units may allow more flexible placement and servicing. Compare the actual targets, ceiling constraints, controls and installation cost before choosing.
Can each head aim in a different direction?
Only if the exact product configuration allows it. Check the mechanical drawing and test an installed sample. Some heads may share electrical control even when they aim separately.
Does a black baffle guarantee low glare?
No. It may reduce the apparent brightness of the aperture, but glare depends on the optical design and viewing geometry. Inspect the sample from normal occupant positions under the planned lighting scene.
Can one cutout size cover every variant in the family?
Do not assume so. The cutout, trim and recess depth may change with frame or head count. Obtain the dimensioned drawing for every variant and verify a pilot opening.
What should an importer request with a sample?
Request the exact model and revision, dimensioned drawing, photometric data for the chosen optic, driver and control details, installation instructions, finish sample and a record of what has been approved. Keep the sample identifiable for later batch comparison.
Final recommendation
Specify modular multi-head COB downlights as a small system, not a decorative frame. Define the lit targets, verify the exact optics and controls, coordinate the opening and driver access, then approve an installed sample. Once the project team can reproduce that approved configuration, head count becomes an informed choice rather than a guess.
